
Panelica can now host PostgreSQL databases for websites (Databases > PostgreSQL). It is a separate PostgreSQL server on port 5432, installed with one click, apart from the panel's own internal database. Every database belongs to a domain and has its own user. The root administrator can open pgAdmin 4 from the same page.
Availability: panelica-server 1.0.551 / panel-frontend 4.5.354 or later on the beta channel (Panel Settings > System Updates > Stable + Beta).
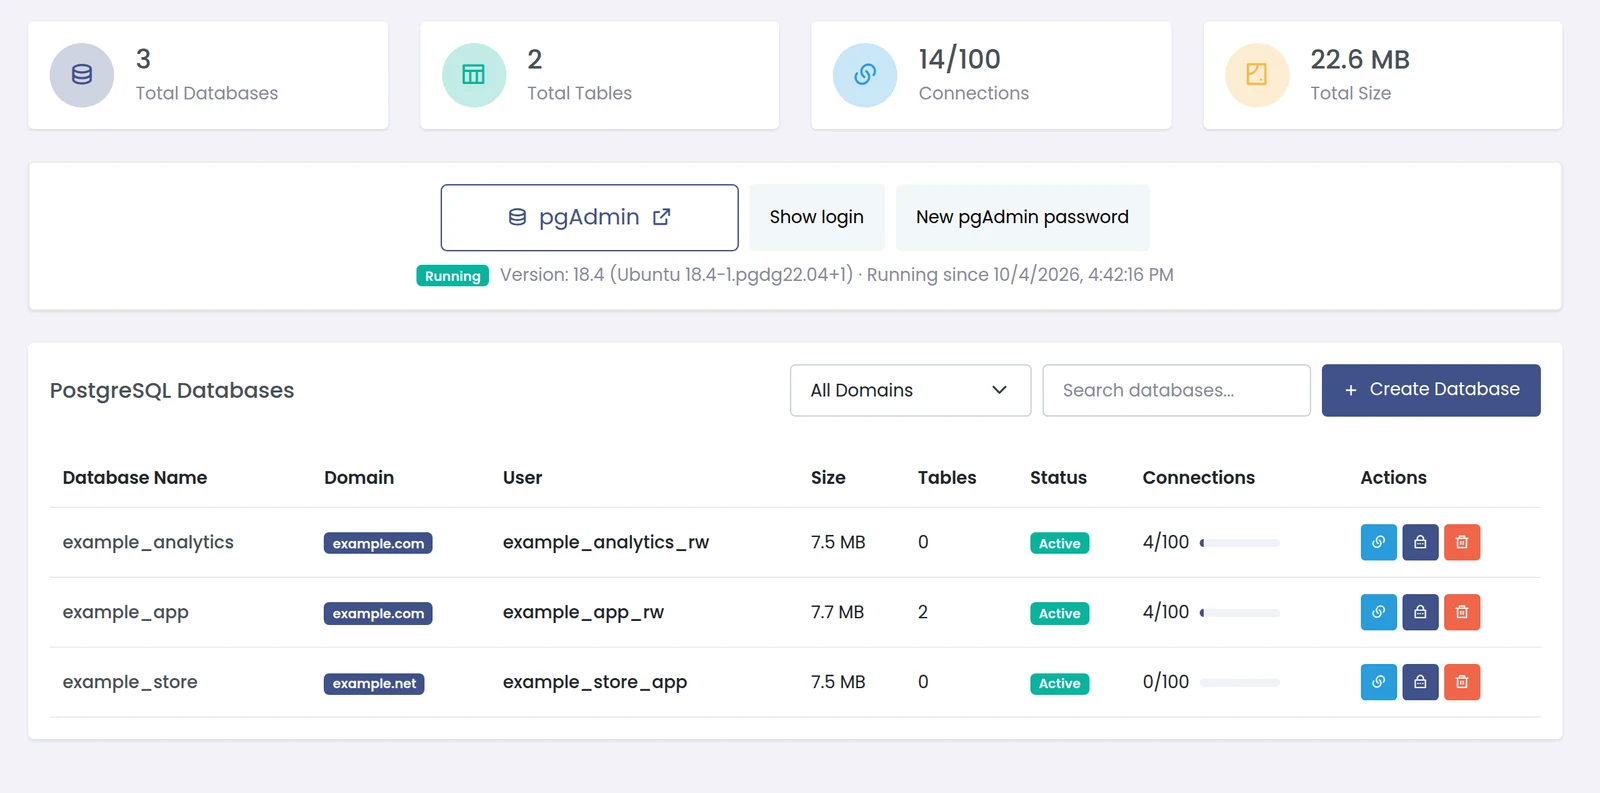
Databases > PostgreSQL > Install PostgreSQL. If port 5432 is already used by another program, the page says so and does not install over it. Other accounts see "PostgreSQL has not been enabled on this server yet" until you install it.
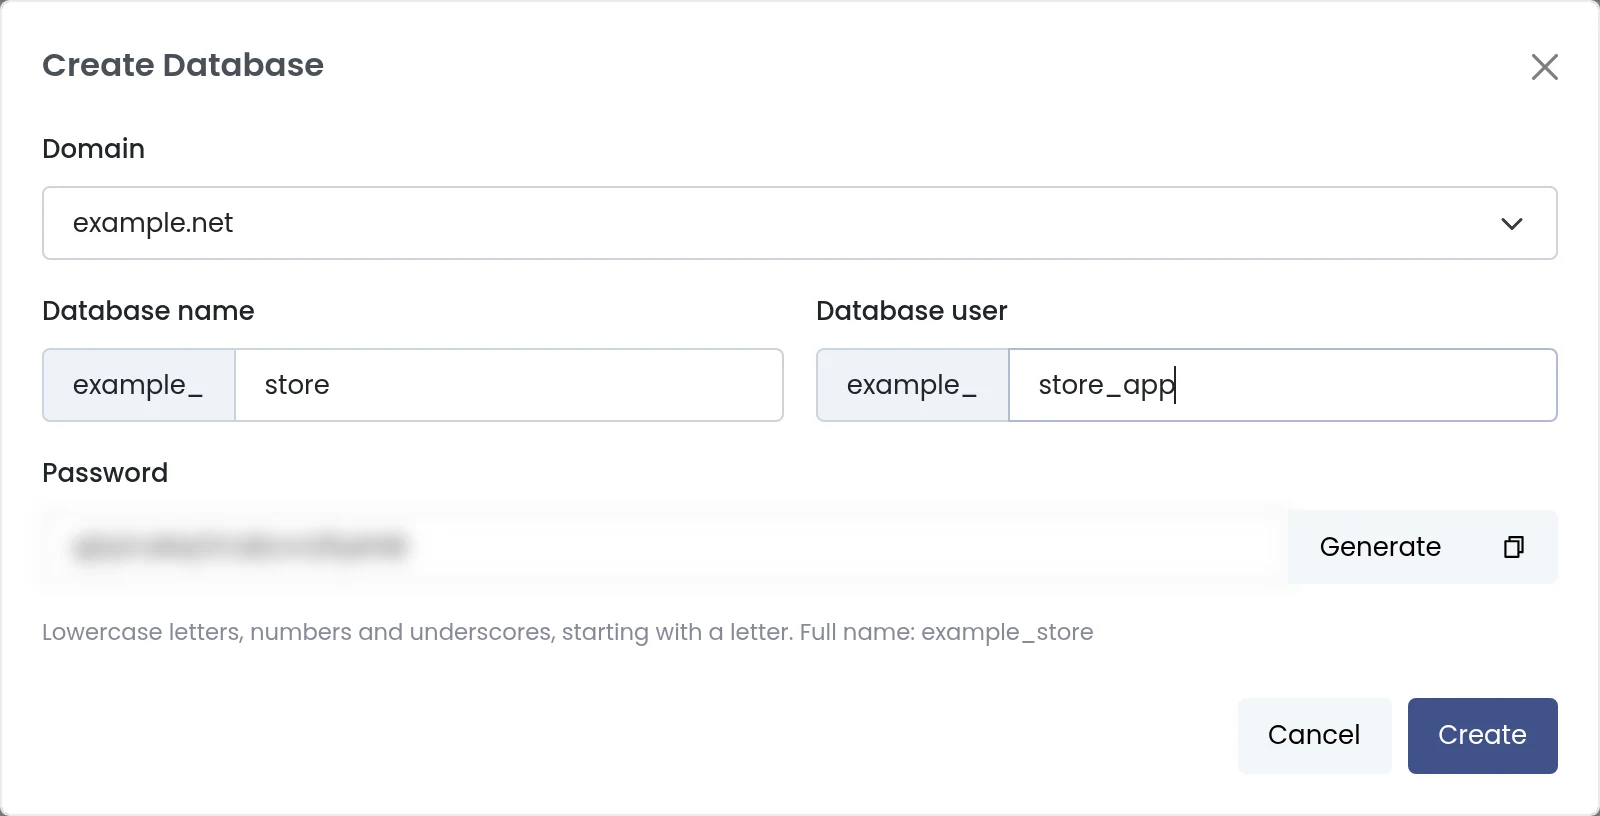
Create Database > pick the domain > database name > user name. A password is generated for you (Generate / copy buttons). Names are lowercase letters, numbers and underscores, starting with a letter, and get the domain prefix, e.g. example_store and example_store_app.
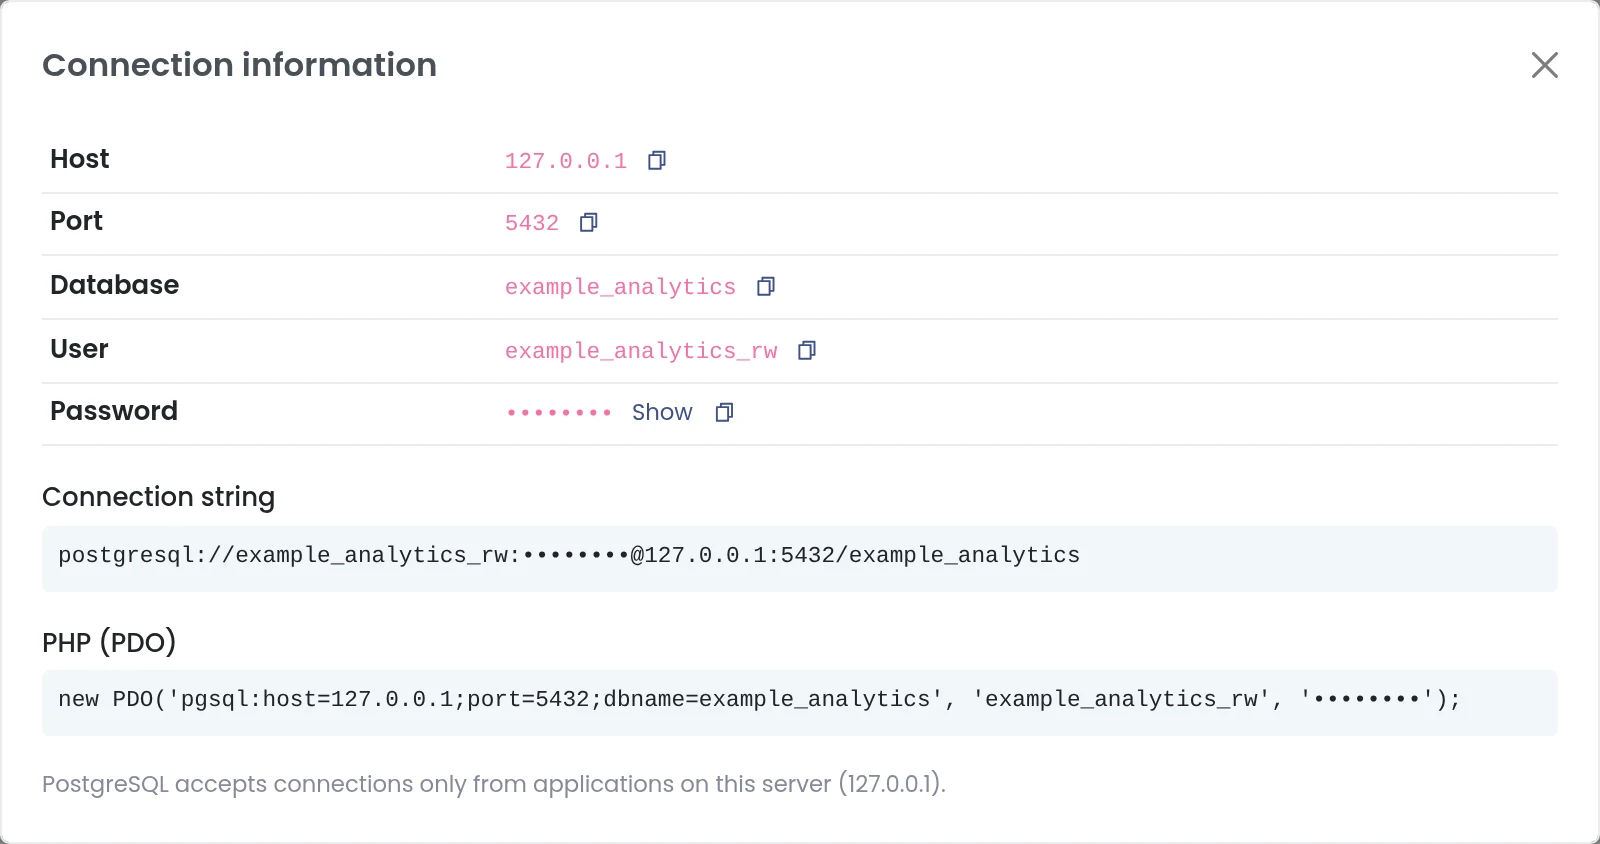
The link icon on the row shows host, port, database, user, password (Show button), a connection string and a PHP PDO line. Connections are accepted only from the server itself (127.0.0.1).
Example for Laravel:
From your own computer, use an SSH tunnel; the database port is not open to the internet.
Tip: in pgAdmin you are the superuser, so new tables belong to postgres. Start the query with
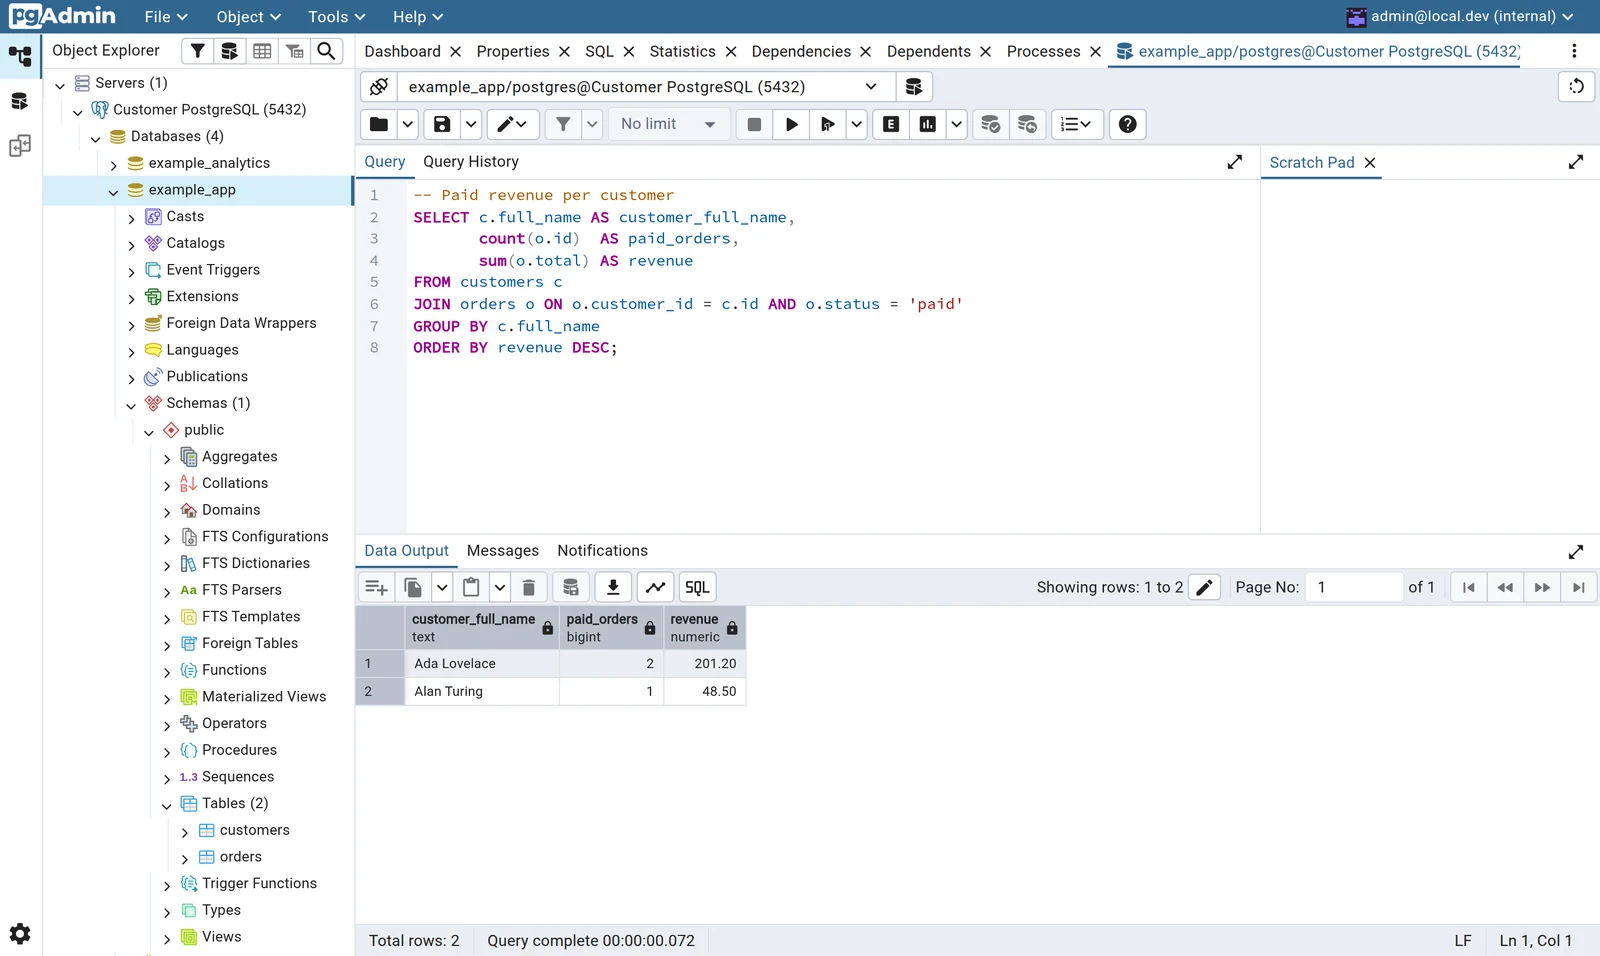
(your database's user) so the application can use what you create.
Feedback on what you would like next for PostgreSQL is welcome below.
Full write-up: https://panelica.com/blog/postgresql-hosting-in-panelica-site-databases-and-one-click-pgadmin
Availability: panelica-server 1.0.551 / panel-frontend 4.5.354 or later on the beta channel (Panel Settings > System Updates > Stable + Beta).
Databases > PostgreSQL > Install PostgreSQL. If port 5432 is already used by another program, the page says so and does not install over it. Other accounts see "PostgreSQL has not been enabled on this server yet" until you install it.
Create Database > pick the domain > database name > user name. A password is generated for you (Generate / copy buttons). Names are lowercase letters, numbers and underscores, starting with a letter, and get the domain prefix, e.g. example_store and example_store_app.
The link icon on the row shows host, port, database, user, password (Show button), a connection string and a PHP PDO line. Connections are accepted only from the server itself (127.0.0.1).
Example for Laravel:
Code:
DB_CONNECTION=pgsql
DB_HOST=127.0.0.1
DB_PORT=5432
DB_DATABASE=example_store
DB_USERNAME=example_store_app
DB_PASSWORD=the-generated-password
From your own computer, use an SSH tunnel; the database port is not open to the internet.
- On the pgAdmin card press Enable pgAdmin. If pgAdmin is not installed yet the panel installs it first; this can take a few minutes.
- Show login gives you the pgAdmin e-mail and password (New pgAdmin password replaces it).
- Open pgAdmin. The server Customer PostgreSQL (5432) is already registered.
- On the first connection pgAdmin asks for the postgres password: leave it empty and press OK. The connection goes over the local socket.
Tip: in pgAdmin you are the superuser, so new tables belong to postgres. Start the query with
SQL:
SET ROLE example_app_rw;- Restoring a single PostgreSQL database from a backup (server backups do include PostgreSQL; restore works per backup).
- PostgreSQL in Panelica-to-Panelica migration.
- PostgreSQL endpoints in the External API and the CLI.
Feedback on what you would like next for PostgreSQL is welcome below.
Full write-up: https://panelica.com/blog/postgresql-hosting-in-panelica-site-databases-and-one-click-pgadmin